Engine#
Cognizant Intelligent Test Scripter lets users view the overall engine structure available in the installation location. This is where the methods corresponding to all the available actions are defined and this folder can be imported into any IDE that supports Java. This gives users the flexibility to alter the code of the existing actions or add additional custom actions. After making modifications to the engine, the users can compile the JAR file and add it to the UI.
Note: Please note that while using CITS 1.4, Java 11 (for CITS 1.3, Java 9) is mapped to Eclipse IDE's workspace settings in order to enable a seamless import of engine and custom method project
How to open the Engine in Eclipse?#
-
Open Eclipse IDE
-
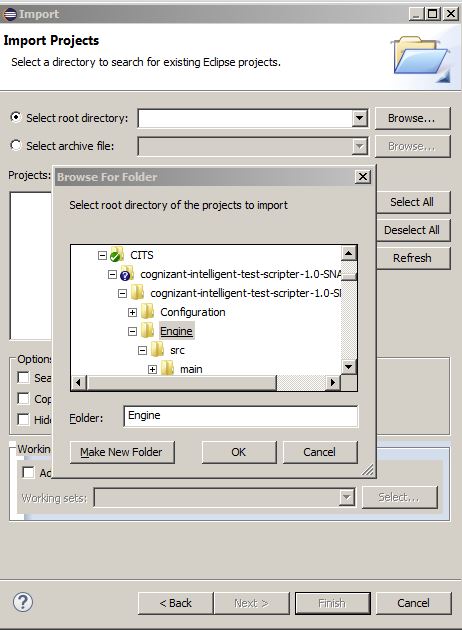
Import project using File > Import > Existing Projects into Workspace
-
Locate the project Engine in your system.
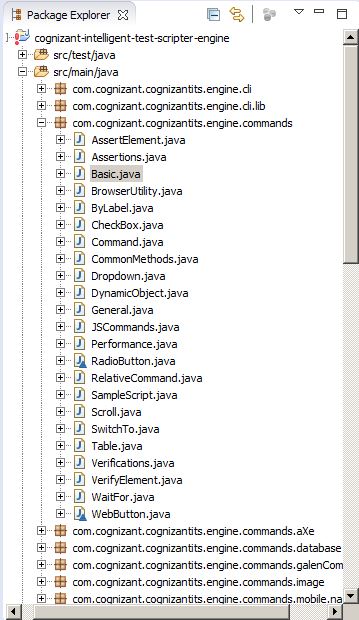
- After performing the above steps, the project structure will look like this.
-
Here you can view the source code for every predefined action in Cognizant Intelligent Test Scripter, under the respective java class file.
Note: After Importing the Engine java project, ensure that the project is imported properly.
Follow the steps below to check the same,
-
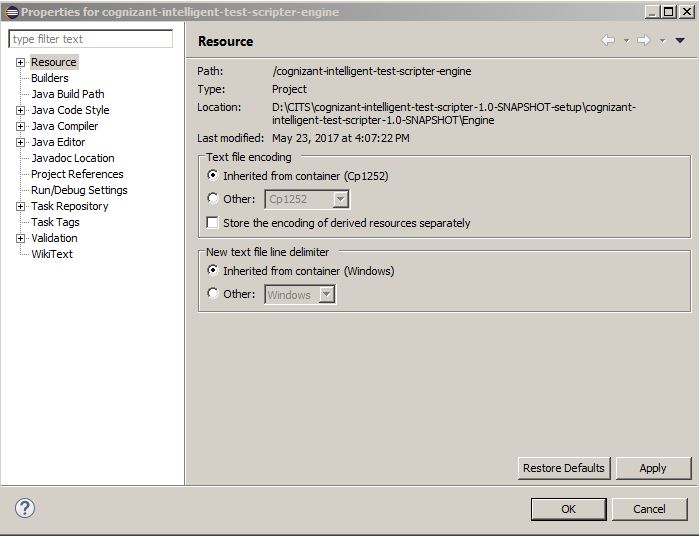
Right-click on the Project and choose Properties from the context menu options.
-
In the Resource window, check if the eclipse project is pointing to the right location, as shown.
-
Note: You can also check if you are working on the right Engine in case you have installed multiple versions of Cognizant Intelligent Test Scripter.
Where to place your custom method?#
Once you have coded your custom method, you can place them in any one of the following locations,
-
You can place your custom method in a separate .java file under any package of src folder in the Engine.
-
You can create a custom package in the Engine under src and place all your .java files containing the custom methods in it. This is the best practice to add your custom method.
-
You can also create a new java project and place your methods in it under a package.
-
You can have your custom methods in a .java file saved in a separate location and inject the same in to the UI (Don't inject anything from the Engine project)
How to use your custom method from the UI?#
To use your custom method in the test case, you need to follow one of the following methods, depending on where you have place the .java files.
Method 1:
If you have a simple custom code to introduce into the UI, you can go with the Inject script option.
Procedure for injecting custom script:
• Navigate to Automation > Inject Script from the menu in the UI. A new dialog box will pop up as shown below
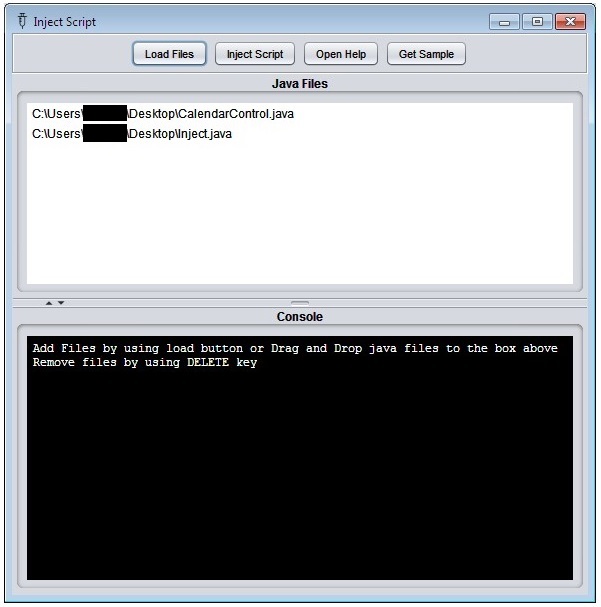
• The various options available in this window are described below,
- Load Files: Add your custom function .java files using the Load button or drag and drop your java files containing the custom methods
- Inject Script:Select the files and click on inject script to inject the custom methods in those selected files
- Open Help: To open the help document
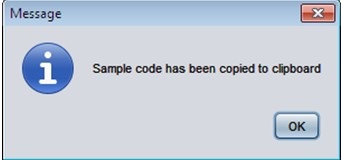
- Get Sample: Will copy a sample code for inject script to the clip board, as shown in the prompt below,
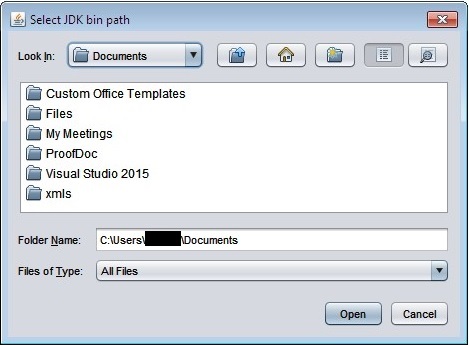
Inject script requires jdk to compile your .java files in to .class files and run the same.
If jdk path is not set in the Run.bat file or in the system Path variable or in Java_Home then, the following prompt will appear, to set the jdk path
In case of any compilation errors you can watch the console section of the Inject script window.
Note: After injecting your method, click on the
icon and your custom method will be available in the UI, if you have given the Action method for validation in your custom method.
Method 2
You can also create a new java project and define your custom methods in it and export this project separately as a jar file in the location <installation location>\lib\commands
- In the UI, go to Automation->Create CM Project. Give the location where the Project is to be created and click on Create Project.
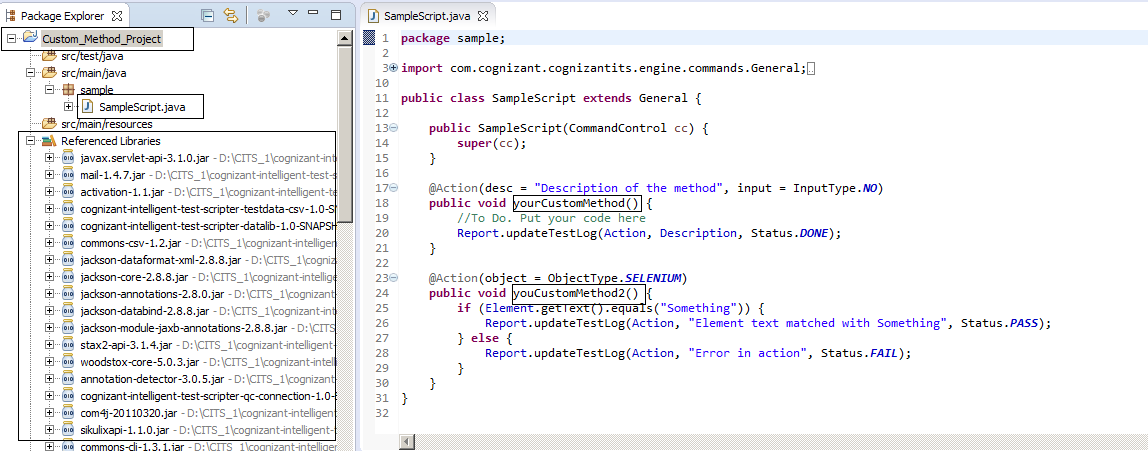
-After the project is created, import it into any IDE that supports Java. You can view the project along with the necessary dependency files as shown in the below image:
- You can rename the project, package and class names if required.
After defining your custom method, you can simply export this project as a jar file in the location <installation location>\lib\commands.
Follow the steps below, to do the same,
-
Right-click on the src folder of your project and choose Export option
-
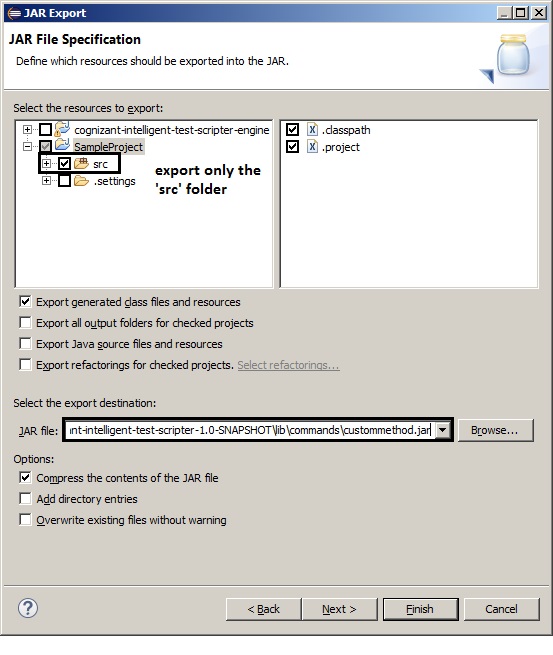
Select jar option as shown below and click Next
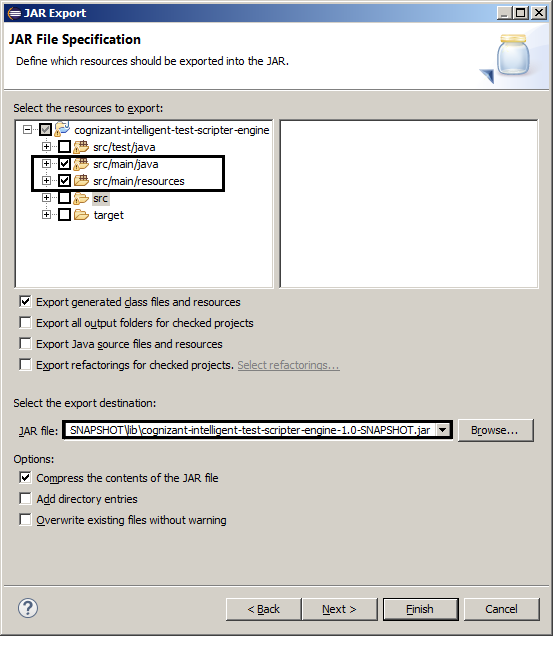
- Export only the src folder and provide the path as <installation location>\lib\commands\< jar name >, as shown in the image below,
Note: Your custom method will be available in the UI, if you have given the Action method for validation in your custom method, after clicking on the Reload icon,
Method 3
You can also place your custom method in the Engine and export the Engine as a Jar file again for the changes to be visible in the UI.
Follow the steps below to export and hence replace the cognizant-intelligent-test-scripter-engine.jar in the installation location under the lib folder.
-
You can place your custom method in any package inside src folder or create a custom package for the same.
-
After placing your working custom method, follow the steps below to export the cognizant-intelligent-test-scripter-engine.jar.jar
-
Right-click on the src folder of Engine project and choose Export option
-
Select jar option as shown below and click Next
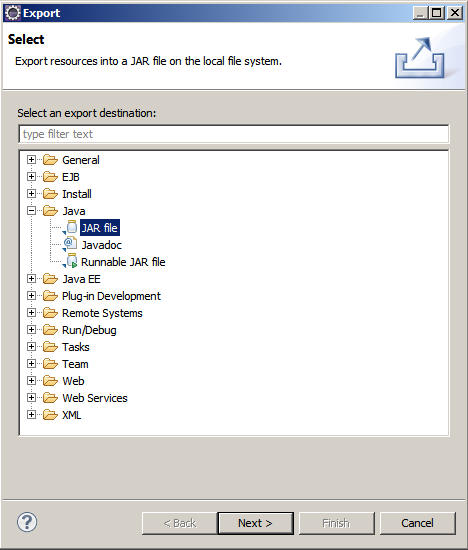
- Export only the src folder and provide the path as <installation location>\lib\cognizant-intelligent-test-scripter-engine.jar, as shown in the image below,
-
How to run/debug a test case from Engine?#
It is a best practice to run or debug your flow once from the Engine, before exporting the jar. In case of any errors or exceptions, you can redesign your flow and finally export the jar once it is done perfectly.
Follow the steps below to execute test case from the Engine.
Scenario 1 In case you have placed your custom method in the Engine, then follow the steps below to run from the Engine.
-
Open Eclipse IDE
-
Open the Engine by following the steps mentioned earlier in the section "How to open the Engine in Eclipse".
-
If you have your custom method in a separate custom package, then follow the steps below to add your package name to the package.properties file available in the installation location under the Configuration folder, as shown in the image below,

- To select the testcase or testset for execution, follow the steps given below.
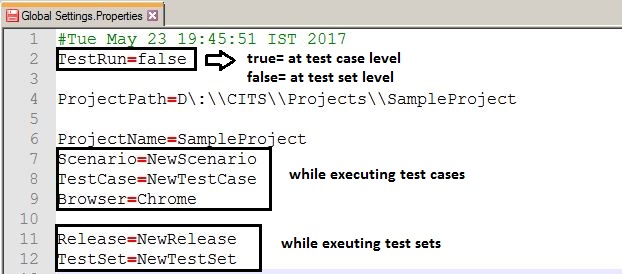
To run a test case or a test set, go to the Configuration folder available in the installation location and open the Global Settings.properties file.
Provide the details as shown in the image below:
- For executing the test case, run the control.java file from the com.cognizant.cognizantits.engine.core package.
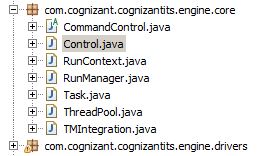
- You can also keep break points wherever required and debug the test case after triggering the execution form the control.java file.
Scenario 2
If you have placed your custom method in a separate project, then follow the steps below, to run or debug the same from the Engine,
-
Open the Engine project and your custom method containing project in eclipse IDE
-
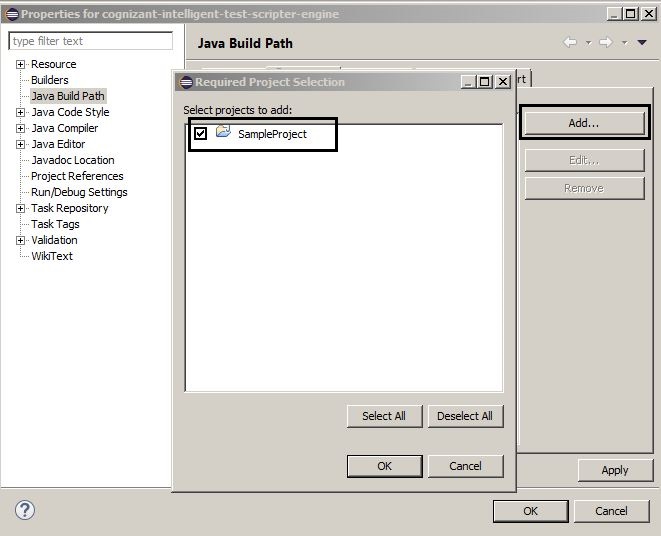
Right-click the Engine project and choose Configure build path.
-
Under the projects tab, click on Add and choose the project and click on OK, as shown below
-
Add the name of the package containing your custom method (in the new project), to the package.properties file in the Configuration folder.
-
Now can debug or run the control.java file to execute your custom method from the Engine.